Cycle Counting

Contents
Introduction
The new Cycle Count feature of entrée version 4 is an important new tool for your inventory management.offers the ability to count a small subset of inventory in contrast with a traditional physical inventory which involves the counting of all items at one time.
Cycle counts are less disruptive to daily operations, provide an ongoing measure of inventory accuracy and procedure execution, and can be tailored to focus on items with higher value or higher sales volume.
You can specify which items should be counted with any or all of the following parameters: warehouse location range, item number range, specific class or all classes, specific brand or all brands, specific temperature zone or all zones, specific UOM or all UOM.
You can also specify which items should be counted by "ABC Analysis", which breaks your items into three groups:
"A" items = Top 20%
"B" items = Middle 30%
"C" items = Bottom 50%

Next you can specify what "ABC Method" to use, which includes either Sales Volume or Item Value.
ABC Analysis Definitions
•Sales Volume = How many were sold.
•Sales Value = How much in dollars were sold.
•Sales Velocity = How many times an item appears on an invoice regardless of quantity sold.
•Item Value = Looks at Real cost.
Finally you can also specify how many items to return for counting including the Top 10, Top 25, Top 50 or All items.
The ABC Cycle Counting method uses the Pareto principle as the basis for this technique. The Pareto principle states that, for many events, roughly 80% of the effects come from 20% of the causes. This method uses this principle to assume that 20% of the inventory in a food distributor's warehouse relates to 80% of the sales and also 80% of possible issues with on hand inventory. These are the “A” items. The principle is then extended to two other categories where “B” items account for 30% of the items and 15% of sales/on hand issues and “C” items represent 50% of the items in the warehouse, but only 5% of sales/on hand issues.
When performing a Cycle Count, your warehouse manager will define the above criteria, and then provide counting assignments to each of your warehouse crew who will be performing the counts. Either a paper Cycle Count Sheet can be produced for each crew member, or in the future the task will be automated with our Electronic Warehouse Manager Android application.
The feature to be added to the Electronic Warehouse Manager app will have each warehouse worker see their counting assignments on their Android tablet. They can either use the barcode scanner or manually enter their counting results on the tablet. The counting results will be viewed on the warehouse manager's desktop computer, and they can force a "recount" of any items that do not look correct. The warehouse worker will then be directed to recount those items.
When used regularly and properly, not only will your inventory be much more accurate, once you're in the habit of continuously cycle counting, you'll probably never have to do a full "close the doors and stop everything" physical inventory again!
The Cycle Counting feature can be found in the Inventory ribbon menu Inventory Transactions section. The Cycle Counting drop down menu has two options:
•Management - This is where the manager determines which items will be counted, will create the cycle count sheets and assign users to perform the count.
•Manual Count - This is where the counts will be entered by the users performing the counts. |
|

The Cycle Counting Process in a Nutshell
1.Before you begin a Cycle Count you must run the Recalculate Inventory on Hand utility in the Inventory ribbon Inventory utilities section to update your on hand numbers.
2.Manager: Creates and saves a configuration, assigns Users and Starts the Cycle Count.
3.Manager: Prints the Cycle Count Sheets and hands them out to the assigned Users.
4.Assigned Users: Perform the counts in the warehouse and records them on the printed sheet.
5.Assigned Users: Login to entrée and enter the cycle count data for each item from their sheets.
6.Manager: Reviews the cycle counts entered, makes changes to counts, approves counts and post counts to inventory for each User.
Cycle Count Management Overview
This Management option is used by the Warehouse Manager to control the entire cycle counting process.
The screen title area will show the selected warehouse number and cycle count configuration in the screen.
Below you see Main-Madison Distribution as the selected warehouse and ATOP20ALL-TOP10 as the loaded cycle count configuration.

Management Filtering Buttons
•Load Button: Once you set your filtering or ABC Analysis options click the Load button to run the analysis and generate the item list for the cycle count.
•Reset Button: Click the Reset button to clear all filters and data and begin again.
File Menu
•Export - Use this option to export the generated cycle count list to another file format including; Excel, Text, HTML, XML or as a PDF. |
|

•Page Setup - Used to format the output pages for printing. Select from the tabs to set paper size, orientation, margins, etc.
▪Page ▪Margins ▪Header/Footer ▪Scaling |
|

•Print Preview - Preview your output before it is printed.
•Print - Print your current cycle counting list.
 This is an example of cycle counting sheet Print Preview that would be printed for the "ATOP20ALL-TOP10" configuration. A warehouse worker would use this sheet to write down their counts for entry into the system using the Manual Count option.

Configuration Menu
•Load - Load a saved cycle count configuration.
•The Load menu will display all the saved configurations and the status of each.
|
|

In this example one configuration has "Cycle Counting Started" as its status.
Some other statuses are Assigned, Approved, and No Assignments. |
|

When a configuration has a status of "Cycle Counting Started" the Start /Finish area will activate.
The Start and Elapsed times will display and begin to run. |
|

•Save as New - Save the configuration as a new cycle count configuration.
•Configuration name: Enter a new name in the field.
Click OK to save the new configuration and return to the Management screen.
•Users: Use the drop down menu to check the users that will have access to the cycle count configuration information and perform the cycle count. |
|


•Edit Current
Edit the current configuration Users access list.
Click OK to save the configuration and return to the Management screen. |
|

•Delete Current
Click OK to delete the configuration and return to the Management screen. |
|

•Change Warehouse When you select the Change Warehouse option a dialog box will open in the middle of the Management screen.
Use the drop down arrow to access a list of warehouses, select a warehouse.
Click Set.
Now the Analysis will be run against the new warehouse location. |
|


ABC Analysis Section
Enabled by default, use the ABC Analysis parameters to create your cycle count sheet configurations. Configurations can be saved for reuse using the File menu Save as New option. Items Filter options can be used to further filter the ABC analysis. The various drop down menu options are shown below.
•ABC Analysis options |
|

•By options |
|

•Top Item Quantity options |
|

•Time Period options
Last - use the arrows to set the number of time periods.
Now use the drop down menu to the right to select the time period; Days, Weeks, Months or Years. |
|

Item Filters Section
To use the Item Filters only you must first uncheck the box next to ABC Analysis to disable it.
Then set your analysis parameters to generate your cycle count sheets using WH Loc range, Class, Brand, Zone, Item # and UoM. In addition you can enter a specific item number range to organize a list of items to count.
•Click the List Items button to retrieve your filter selections from the SQL databases.
•Click the Save button to save your filtering selections.
•Click the Reset button to clear your filter selections and begin again.

•Exclude "LB." Items - Check this option to exclude pound items from the analysis.
•With Lots - Check to include Lots.
•Class The classes you have built into Class Maintenance will be listed in the drop down menu here. Make a selection for your analysis.
|
•Brand The brands from Brand Maintenance will be listed in the drop down menu here. Make a selection for your analysis.
|


•Zone The temperature zones you have set up in the system will be listed here. Make a selection for your analysis.
|
•UoM Select the unit of measure you would like included in the analysis.
|


•Vendor - Allows you to do Cycle Counting by Vendor using the drop down vendor list to make your selection. |
|

•Flagged to Count Check this option and uncheck the ABC Analysis option. Then click the |
|

•Assignments
Once a Cycle Count configuration is selected the Assignments drop down list will show the users assigned when you created the configuration. The status of the users cycle count work will also be displayed.
When you click a username in the Assignments list their counted items will be activated in the screen below. |
|

•Start - Shows the Start time and the Elapsed time for the current cycle count configuration.
• Click the Refresh button to refresh the data in the screen grid.
•Use the Cancel Process button to stop the cycle count process for the current configuration. |
|

•Finish - Once the users have submitted their numbers and have clicked the Finish button in the Manual Cycle Counting screen the Finish area will be activated in the Management screen so the manager can verify, approve and post the counts.
▪Approve all list - Click to approve all the counts for the currently loaded user.
▪Post to Inventory - Click to post all the counts into the inventory file for the item for the currently loaded user.
Manual Count Screen Overview
This option will be used by the users (warehouse workers) to input the counts collected on their assigned cycle count sheets. The user will login to the entrée system using their assigned username and password. Then use the Manual Cycle Counting screen to enter the counts from their cycle count sheet.

Your Assignments Section
•Lists all the users that are assigned to your current cycle count configurations.
•Single click a User name here to view the cycle count sheet configuration they are assigned to in the Cycle Counting Sheet list to the right.
•The Assignment Status shows you where the user is in the cycle count process. Possible status are: Cycle Count Started, Assigned, Approving in process, Approved, or Pending Approval.
Cycle Counting Sheet Section
•The section lists all the active cycle count sheet configurations for the selected User name.
•Double-click a cycle count sheet to load the items to be counted and their details. The counts will be entered in the Counted QTY column in the section below.
Buttons:
•Print - Used to print a hard copy of a count sheet or save it to a file.
•Finish - When a user has completed entering their cycle count data from their sheet they will click Finish to post their numbers for the manager to approve. A warning message will display: Do you want to post your changes for approving? Respond Yes or No to the message.

•Cancel - Use this button to cancel a count for a user. A warning message will display: All entered data will be lost. Do you want to cancel Cycle counting process? Respond Yes or No to the message.

•Save & Exit - When a user has entered some counts and needs to finish entering counts later they can click this button. Then later they can return to their count sheet and complete their work. The screen will close and return you to the main entrée screen without any message.
Run the Recalculate Inventory on Hand Utility Before a Cycle Count
NECS strongly recommends all users are out of the entrée system, when this utility is run.
1. Go to the Inventory ribbon menu Inventory Utilities section Recalculate drop down menu. 2. Select Inventory on Hand in the drop down menu. |
|

3. The default Recalculate Inventory dialog will open.
a. If your inventory includes Lot items continue and use this default to run the recalculate process and click OK.
|
|

b. If you do not have Lot based items remove the check from the second check box and click OK. |
|

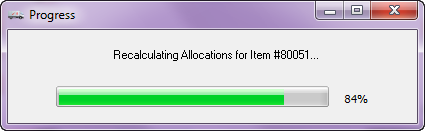
4. The Progress dialog will display until all the recalculations have been completed.
5. Once the Progress dialog closes you can proceed to the next section of this chapter, How to Create and Start a Cycle Count, and begin the cycle count process. |
|
How to Create and Start a Cycle Count
A company manager will use the analysis tools and filters, described in the Cycle Count Management section, to determine what items need to be counted. Once a satisfactory analysis is extracted the manager will save the new Cycle Count Configuration using the Configuration menu. When saving the configuration you will assign the users that will be performing the cycle counts for the specified items. All saved configurations can be accessed and loaded using the Configurations menu. The manager will print the cycle count sheets and hand them out indicating the items assigned to be counted for each user.
1. First you must determine the items that need to be counted using the filtering options at the top of the screen and save your cycle count sheet configuration.
You have 3 options for creating cycle count sheets: ABC Analysis, Item Filters and Flagged to Count.
•ABC Analysis: Use the filtering options in this section to generate a list of items to count (option is checked by default).
•Item Filters: Uncheck the ABC Analysis option first then use the Item Filters section options to determine which items to count.
•Flagged to Count:
You should have checked the Flag to Count or Always Count options for items in the Inventory file > Inventory Tab > Cycle Counting section as seen here. |
Inventory file Cycle Counting Area |

a.In the Cycle Count Management screen you must uncheck the ABC Analysis option.
b.Check the Flagged to Count option.
c. Click the Refresh button in the Start area. The items will be loaded into the screen from the inventory file.
d.Click on an item and the items details will be displayed in the area at the bottom of the screen.
e.Remove the checks on the items you do not want counted at this time.
2. Once the items in our Flagged to Count example are loaded on the screen you must save the configuration as a new cycle count configuration with the users assigned to perform the count.
a.In the Configuration menu select Save as New.
b.Enter a unique Configuration name. In this example we used "FlaggedToCount".
c.Check Users in the drop down list that will be assigned to perform the cycle count in the warehouse.
d.Click OK.

This is the new "FlaggedToCount" configuration being saved in the Management screen.
3. Once you click OK and save the configuration the Start Process button area and the timer will be enabled.
4. Once you click the Start Process button the timer will activate and display the Start and Elapsed times.
•The Assignments area, which contains the list of the users assigned to the cycle count, will be enabled. The users assigned to perform the cycle count will be listed here. Once they get their cycle count sheets they can begin counting the items on the sheet in the warehouse.
•The Cancel Process button will now be enabled in case you need to stop the cycle count and restart it at a later time.
•Now the manager can go into the Manual Cycle option and click one of the users in the Your Assignments area which will display the "FlaggedToCount" configuration in the Cycle counting sheet area.
•Double-click the "FlaggedToCount" configuration in the Cycle counting sheet area and the items to be counted and their details will be displayed in the screen below. You have the ability to drag and group by column as in other areas of the system.

•At this time the manager will use the Print button at the bottom of the screen to print the cycle count sheets for the selected user as seen below. The user's name will appear at the top of the sheet with a blue Count: to indicate where to write the count number. Provide a sheet to each assigned user so they can record their counts for entry later into the system. Now the users will take their sheets and go to the warehouse to perform the count.

How Assigned Users Enter Cycle Count Data
Once the users get their cycle count sheet and assigned items they will perform their counts in the warehouse and record the results on the sheet. When the item cycle counting has been completed by each user they will login to entrée and enter their results using the Manual Count option in Cycle Counting in the Inventory ribbon menu. When the users click the Finish button the counts will be saved in the configuration and are set to "Read Only".
1. Once a user has received their cycle count sheet they will go to the warehouse and complete the counts for their assigned items and enter their numbers on the cycle count sheet.
2. Next the user will login to entrée go to the Inventory ribbon menu and in the Cycle Counting drop down menu select Manual Count.
3. The user will click their name in the Your Assignments area to display the "FlaggedToCount" configuration they are assigned to in the Cycle counting sheet area.
4. Double-click the "FlaggedToCount" configuration in the Cycle counting sheet area and the items to be counted and their details will be displayed in the screen below. Now all the buttons on the bottom of the screen have been activated
5. The user will click the Counted QTY data entry box, which turns green for the selected item and enter the quantity they recorded on their sheet. Then hit the Enter key to record the count. This will be done for all the items the user has been assigned to count. Each user will follow this same procedure for their assigned items.
6. Once all the Counted QTY data has been entered from their count sheet they will click the Finish button.

7. Reply Yes to the Finish warning message: Do you want to post your changes for approving?
At this time the counts for all their items have been submitted to the manager for approval.
8. Each user can double-click the other user names in the same configuration to see what they have posted as "Read Only".
Manual Count after Manager Approval is "Read Only".

9. When you are done click the X in the upper right corner and close the screen. Now the manager has to perform the approval process for the counts.
Approving Counts and Posting to Inventory
Next in the Management option the manager will load the saved configuration to display all the counts entered by the assigned users. Then review the cycle count results one user at a time by going to the Assignments area of the screen and clicking each user to reveal their submitted item counts.
1. The Manager logs into the system goes back to the Management option.
2. In the Configuration menu select Load then double-click the "FlaggedToCount" configuration that is now in Pending Approval status. This will display the items and the counts entered on the screen.

3. Once a configuration is loaded the Assignments drop down list will show the users assigned to it when the configuration was created and saved.
•The status of the user's cycle count work is displayed and will change as the process progresses.
|
|

•When you click on the User name in the Assignments area a "Retrieving Data" message will display. Then the items and the counts entered will be activated in the screen below for that user's count sheet.
4. Click the plus sign (+) to expand each item and the Log Tab will be displayed with the users name and quantity they entered in the Manual Count screen.
In this example multiple users are assigned to the cycle count configuration. The items without the red highlighting in the Counted Qty areas are the items Gloria (our selected user) has counted.
The counts submitted by all other users will be highlighted in red and show zeros. Skip the items with red blocks for now because you will verify those items when you select the user assigned to perform that count.

5. The Recount and Approved check boxes on the far right are now enabled and one will be used for each item as required.
a. Check the QTY Diff, Value Diff and WGT Diff columns for anomalies.

b. The manager verifies each item's count numbers for accuracy and can edit these values.

6. Once a review of all a user's counts is completed the manager will click the Approve all list button and checks are placed in the Approved column for the items. |
|

7. Finally the manager will click the Post to Inventory button to update the inventory file with the users cycle count numbers.
8. This process must be repeated for each user assigned to the current cycle count configuration.
An Approved Cycle Count for Manny.

9. Once all the users cycle counts have been approved and posted the status of our "Flag To Count" cycle count configuration in the Management Configuration Load menu changes to Approved.

•Use the Configuration > Edit Current option to change assigned users and re-use the "Flag To Count" configuration in the future.
•Use the Configuration > Delete Current option to remove the "Flag To Count" configuration from the system.